So the big day has come – your Thunder Bolt has arrived and it is GO TIME for unpacking your Thunder Laser. Hopefully you spent the past few weeks doing your own research and going through the resources we sent you, and have you feel comfortable for what comes next. Now we’re going to cover setting up your machine in its space to get ready for your first cuts
Things To Do When your Bolt Machine Arrives:
This video will offer a quick overview of the process we’ll explain in this article, but you can see just how easy the set-up process is going to be!
Unboxing your Thunder Laser
Important Steps:
Time to set the machine in place:
Remove all cable ties
Place on a sturdy stand
Level your Laser
Set Up your Exhaust fan and tubing.
Connect to your computer
Remove cable ties
Remove all cable ties and packing foam
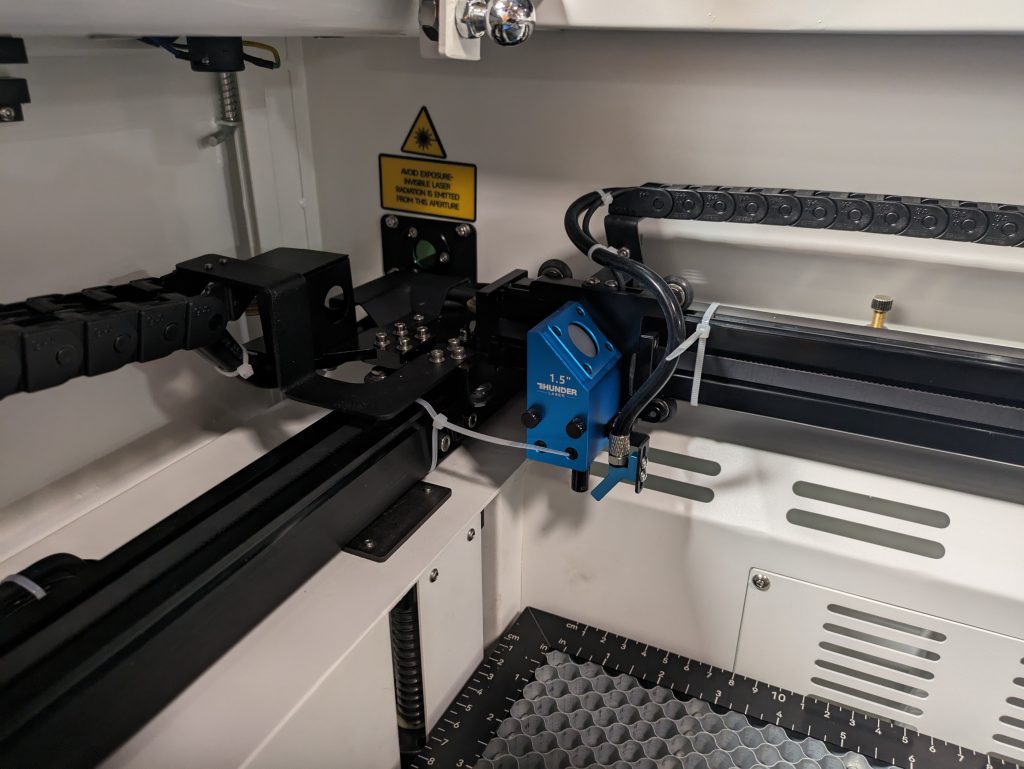
The Laser head and X Axis gantry will have several cable ties holding it in place. Careful remove these until the laser head can move freely
There should also be two more holding the honeycomb bed in place (the front and the rear). Remove these as well.
Level Your Laser
With your machine in its workspace, place a level on your x-axis gantry to make sure the machine itself is level.
After leveling your laser, there is a chance your honeycomb bed may not be level with the rest of your laser. If you notice this, follow the steps in the article linked below
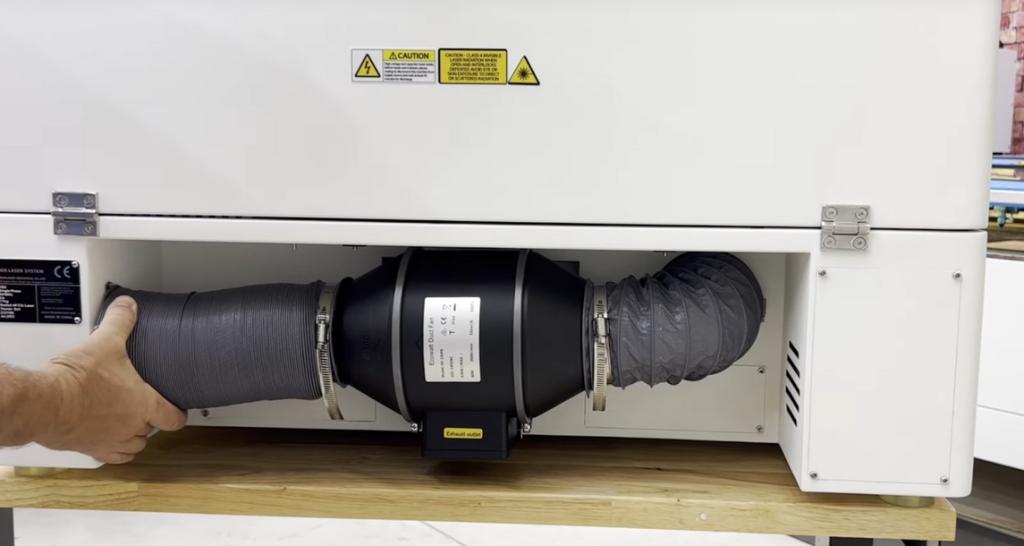
The last major accessory to attach is the exhaust fan and tubing. Begin by attaching the vent tubing to the 6” exhaust port on the back of your laser. Secure this with 6” hose clamps until you are sure it is lacked on air tight – you can adjust this later if you detect smoke while cutting
Next, attach the tubing to the intake side of your exhaust fan. There will be a sticker of an arrow to indicate the direction of airflow.
Plug your exhaust fan into the remaining outlet plug on the back left side of the laser, below the compressor plug.
See the article below for more information about our recommended exhaust setup
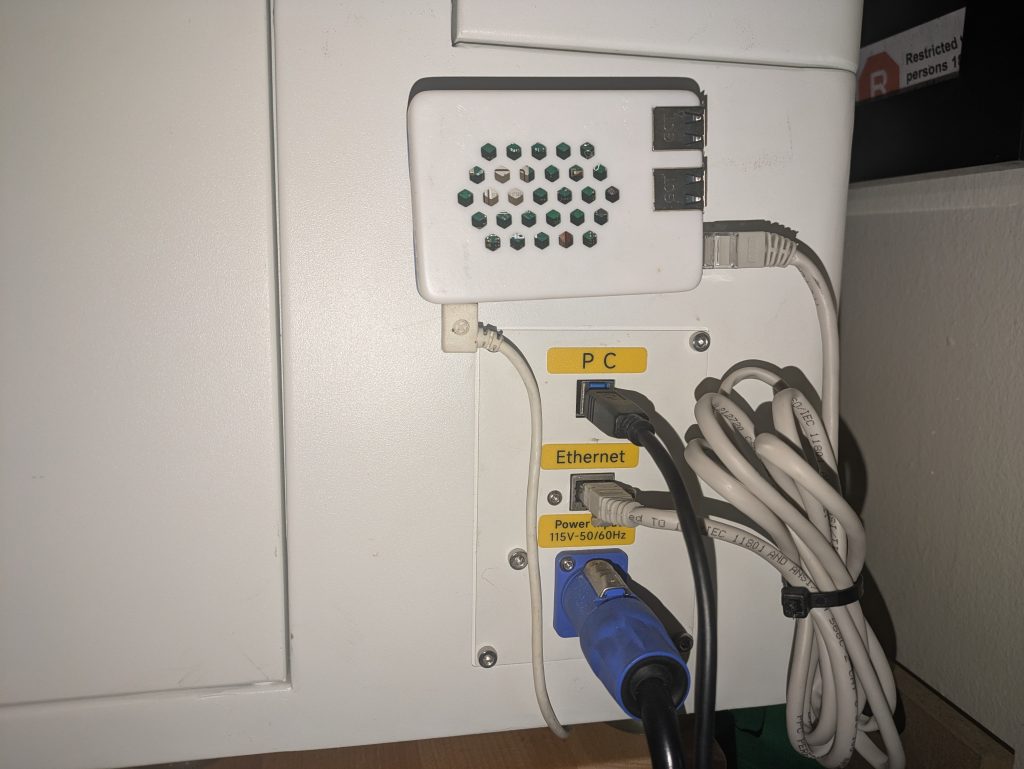
The final step in setting up your laser is plugging it into your computer. There are a few different ways you can connect – USB, Ethernet, or wirelessly through Lightburn Bridge – we’ve created this helpful article for whatever method you choose:
PLEASE DOUBLE OR TRIPLE CHECK THAT YOUR RECEPTACLE IS NOT 220v.
If you power the machine with 220v, it will fry the 36V motor driver power supply, the main contactor and LPSU and it is not covered under warranty.
Now that the machine is set up and ready to run, it is time to power up the machine using the key from your toolbag
Things to note about powering up the machine:
The KEY switch provides power to lights, controller and motor. Turn it clockwise to engage the laser
The laser will need approximately 45 seconds to ionize the tube. During this time, the main screen will give you a message about homing the laser. Press ENTER to continue. The laser will beep three times when it is ready for use
The BIG red E-stop button. This will immediately cut power to the machine when you press it down, and it will take a solid twist in the direction of the arrows to reset the E-stop after (Even when activated, there is some slight spring action). If you ever encounter a moment where you machine will not turn on, check this switch first – it happens to us all.
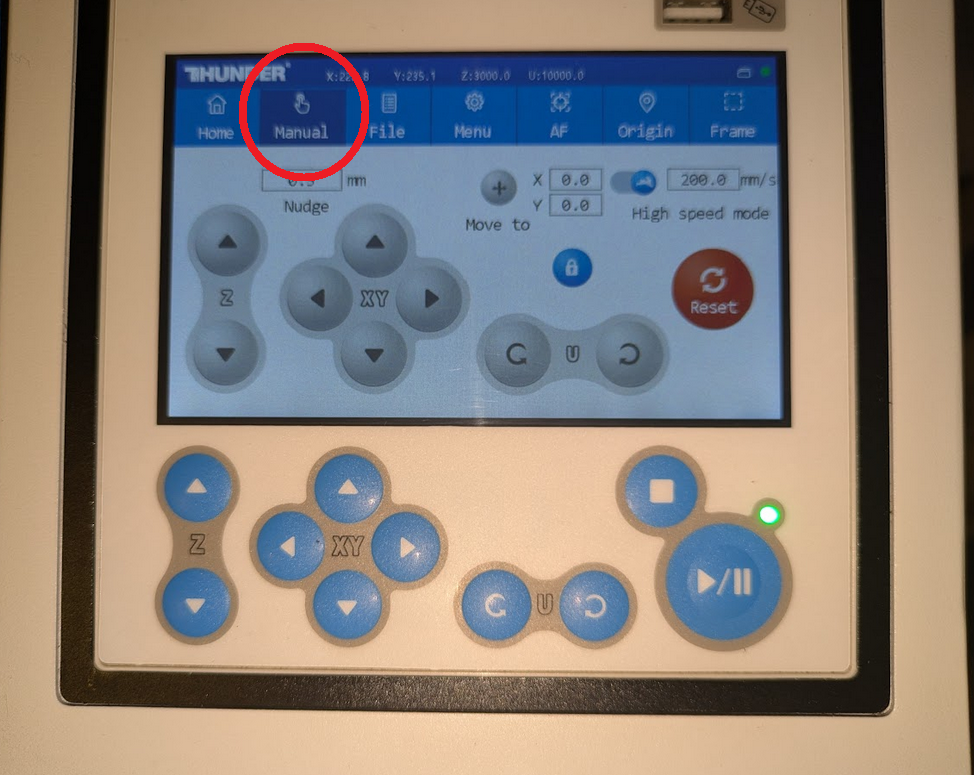
If everything goes properly, you should have complete control of your laser. Test out the movement by pressing the buttons on the controller, or by pressing the MANUAL button at the top of the screen, and using the on-screen controls to move the laser head by more precise measurements


.png "laser cutter Globle") International
International
 United States
 Brasil
 Canada
 Česká
Česká
 Ελλάδα
 Polska
 Ireland
 Portugal
 Lietuva
 Россия
 Deutschland
 Britain
 Україна
 France
 Sverige
 한국
한국
 中国
中国
 ประเทศไทย
 香港
香港
 Israel
 臺灣
臺灣
 India
India
 Australia
 New Zealand
 South Africa