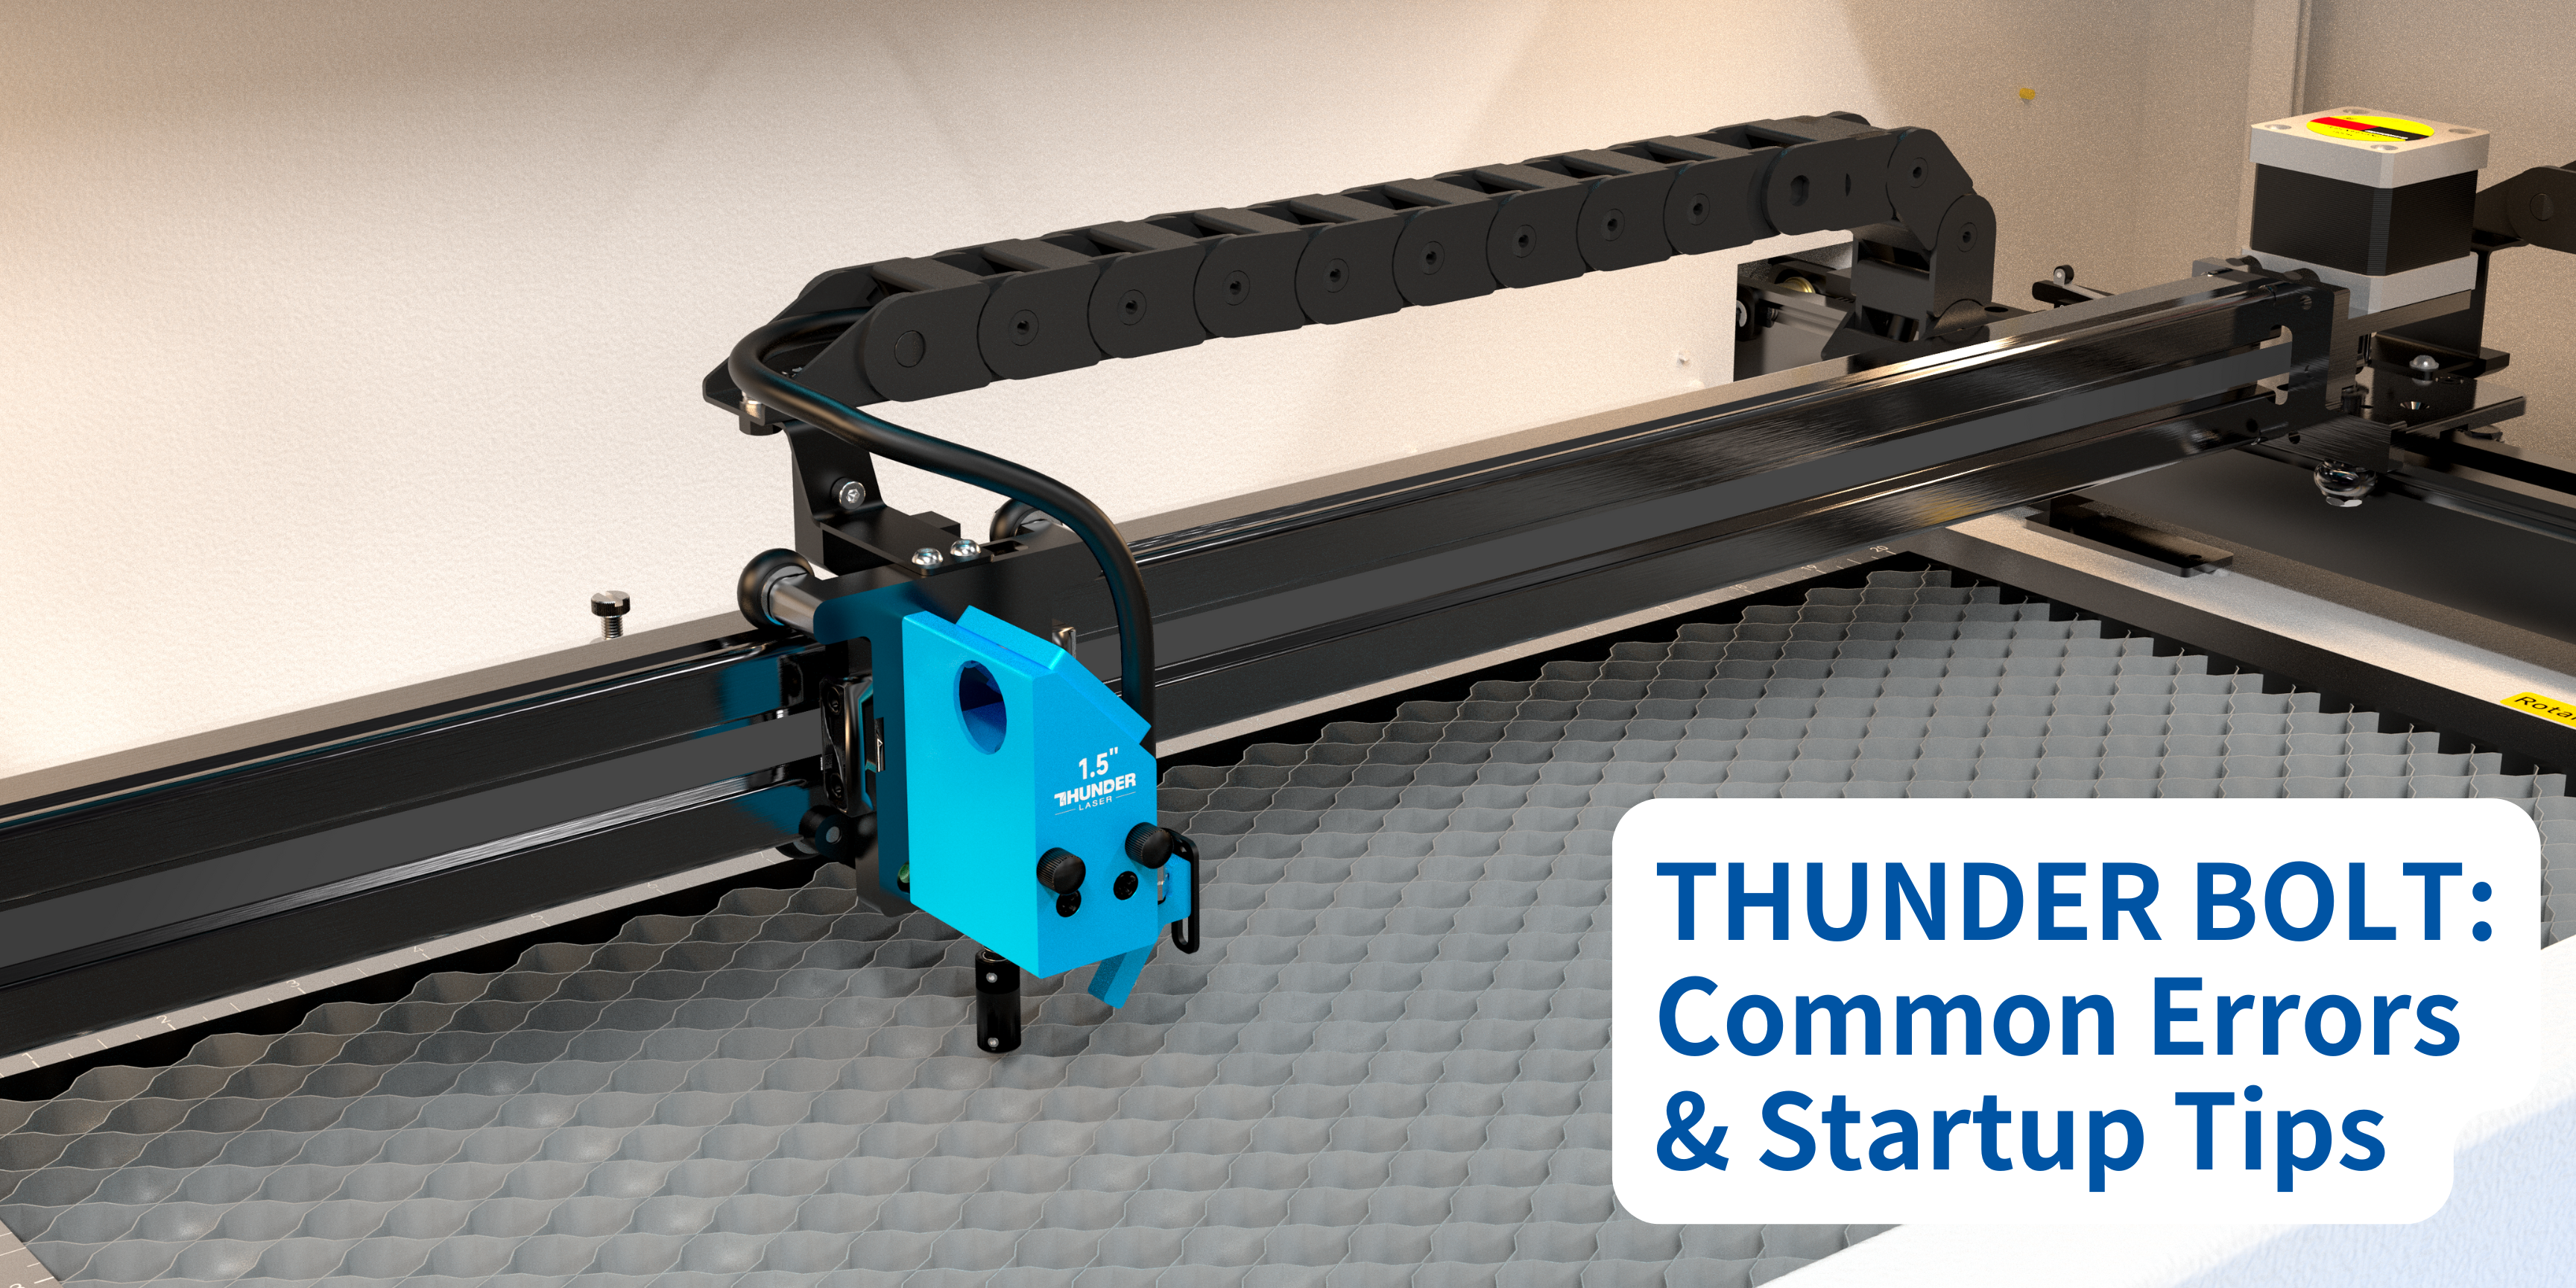
Here are the most common startup tips and errors people run into when setting up their Bolt series Thundr Laser machine.
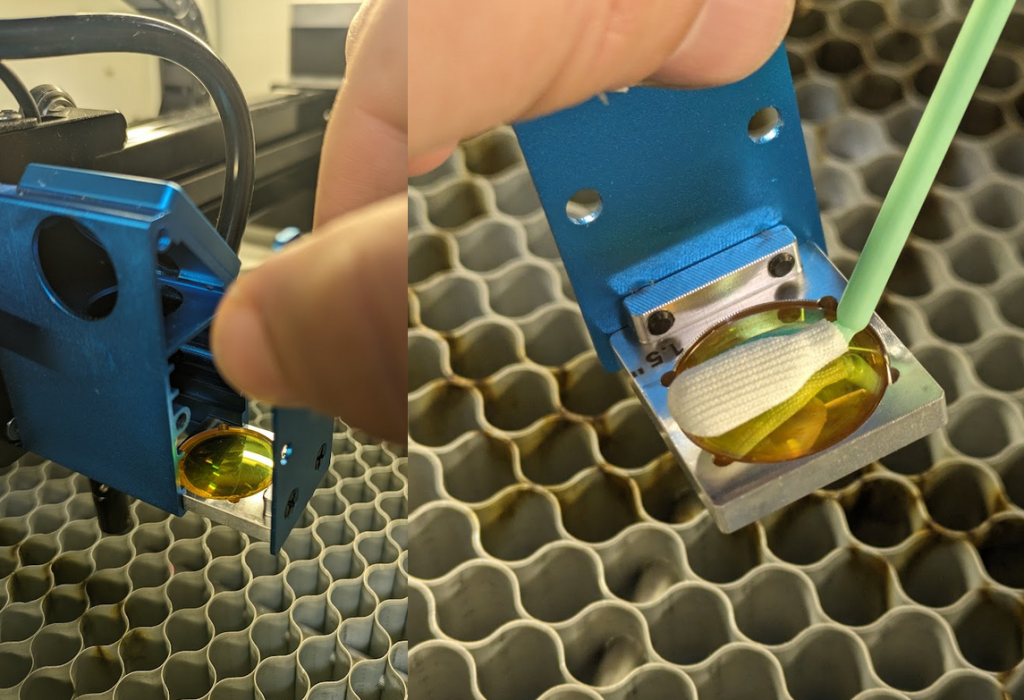
Clean Your Optics
Before your first test cut, you should clean your lens and mirrors first – just in case any dust or debris settled on them during transport.
You should wipe down your lenses and inside of your machine after every few cuts to ensure your lines and engraves turn out clean and focused. If dust and debris build up on the lens, it will not only obstruct the beam, it can cause the lens to overheat and eventually crack.
We recommend using a cloth meant for camera lenses (not an eyeglass cloth) with a 90% alcohol
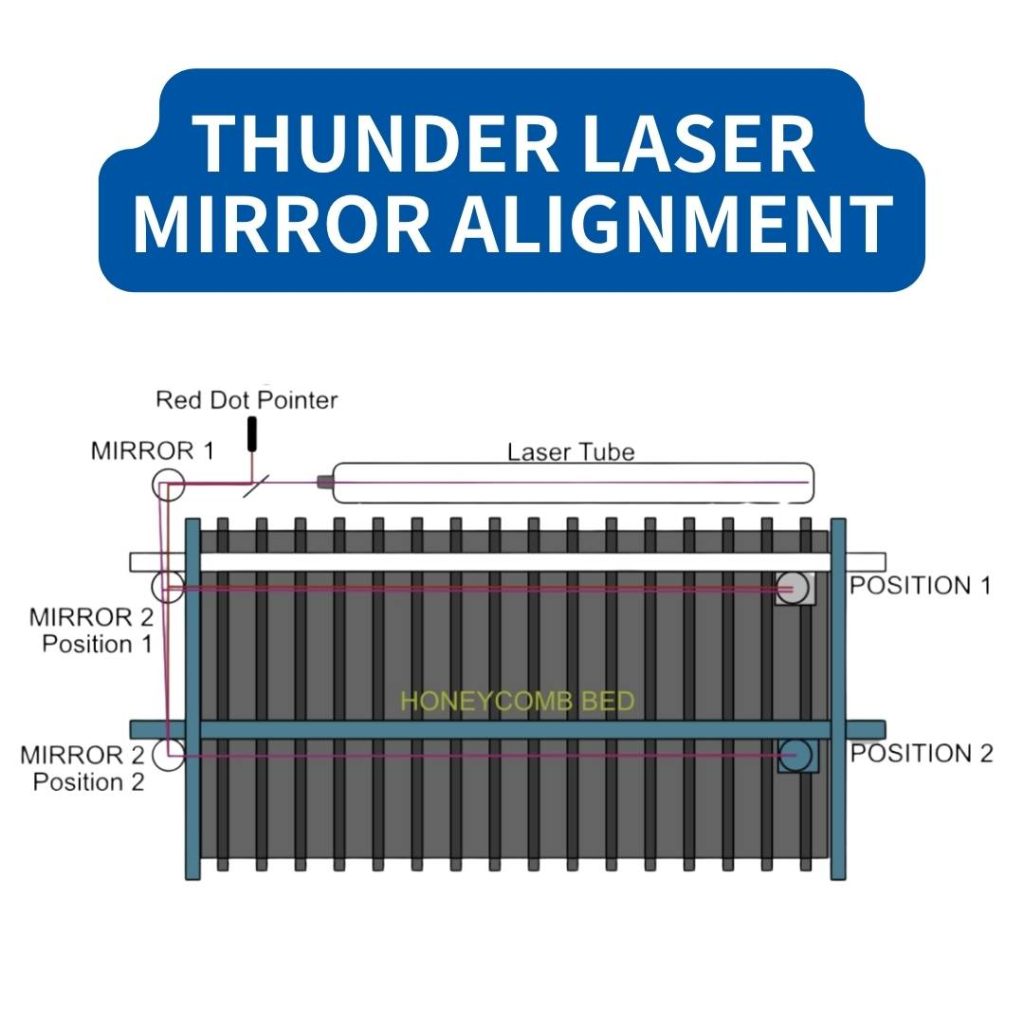
Click the following links below to learn more about this process and why it’s important to maintain the optical path of your laser:
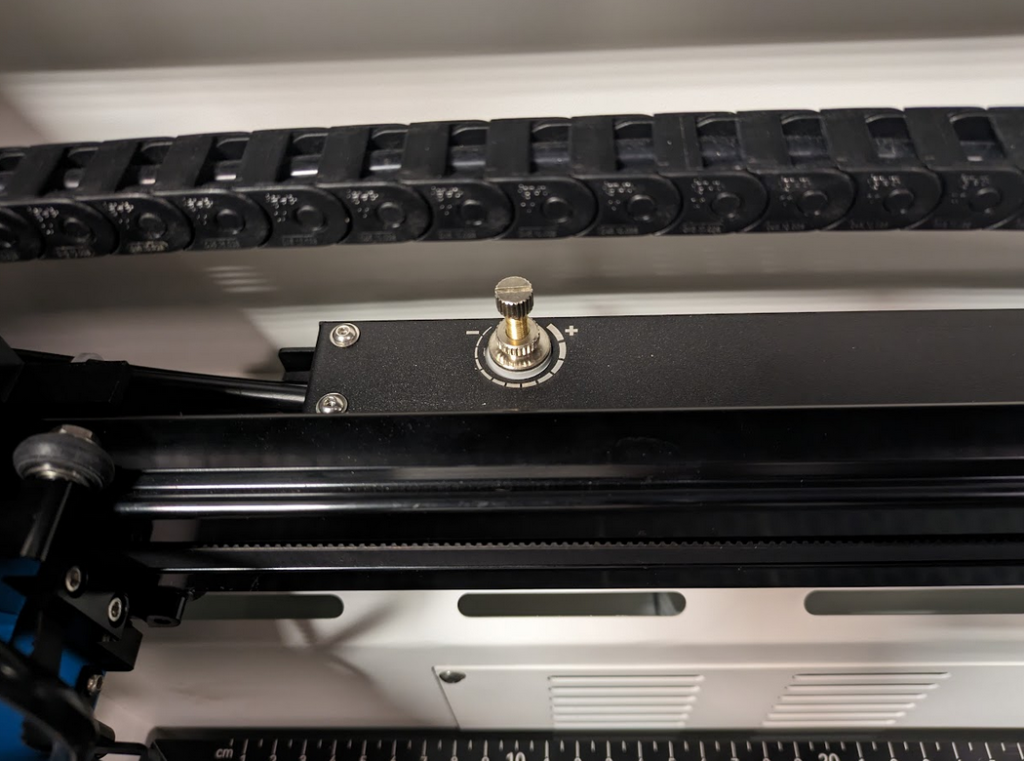
The standard model Bolt has a single air assist that can be adjusted in the back left inside of the X – Axis Gantry.
Adjust the single air assist by loosening the looking nut, and turning the knob to the left to decrease your air, or to the right to increase it
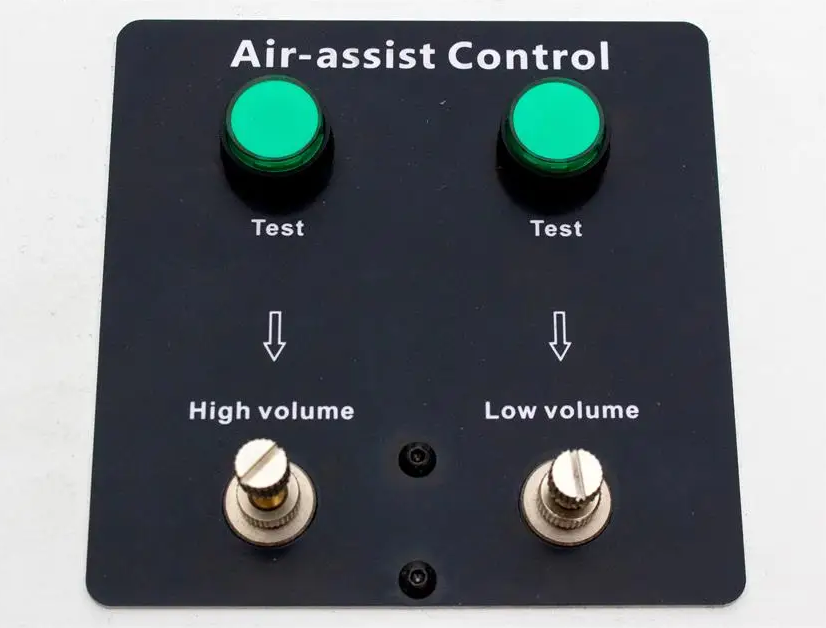
Dual Air Assist
On the Bolt Plus and Pro models, you can find the same 2 stage buttons as found on the Nova series.
Adjust the High Air knob so it is giving the full 5 PSI the air compressor can give, and then set your LOW AIR knob until you feel a faint whisper of air coming from the nozzle
Bolt Plus and Pro Dual Air Assist
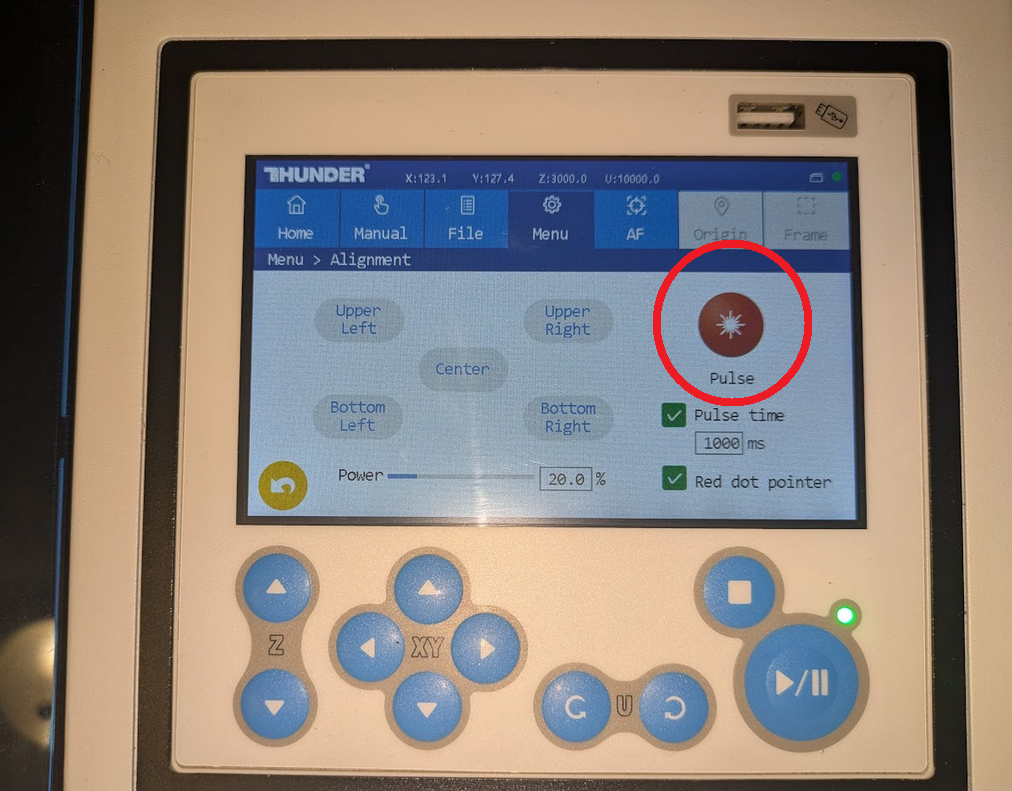
Do a Pulse Check
The first thing you can try before even making a cut, is ensuring that your laser has power and can create a burn – we’re going to show you how to do a pulse check. Place a piece of material under the nozzle and focus the laser head to 6mm above the material
Close all the doors and press the MENU button at the top of the screen, and then the ALIGNMENT button. From here you can control how much power your beam will have, and how long it will fire for. Set your power to 20% and your pulse time to 500ms, and press the PULSE button to see your laser create a small burn.
If your laser does not create a pulse burn mark on your material even after 1 second, contact support@thunderlaser.ca
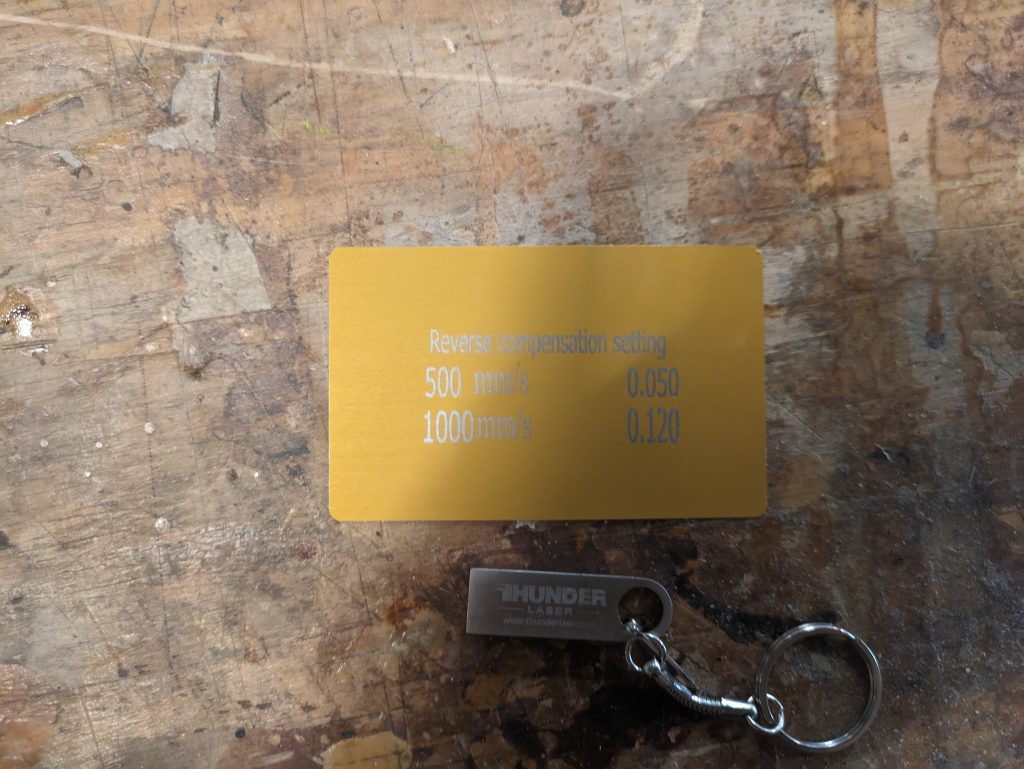
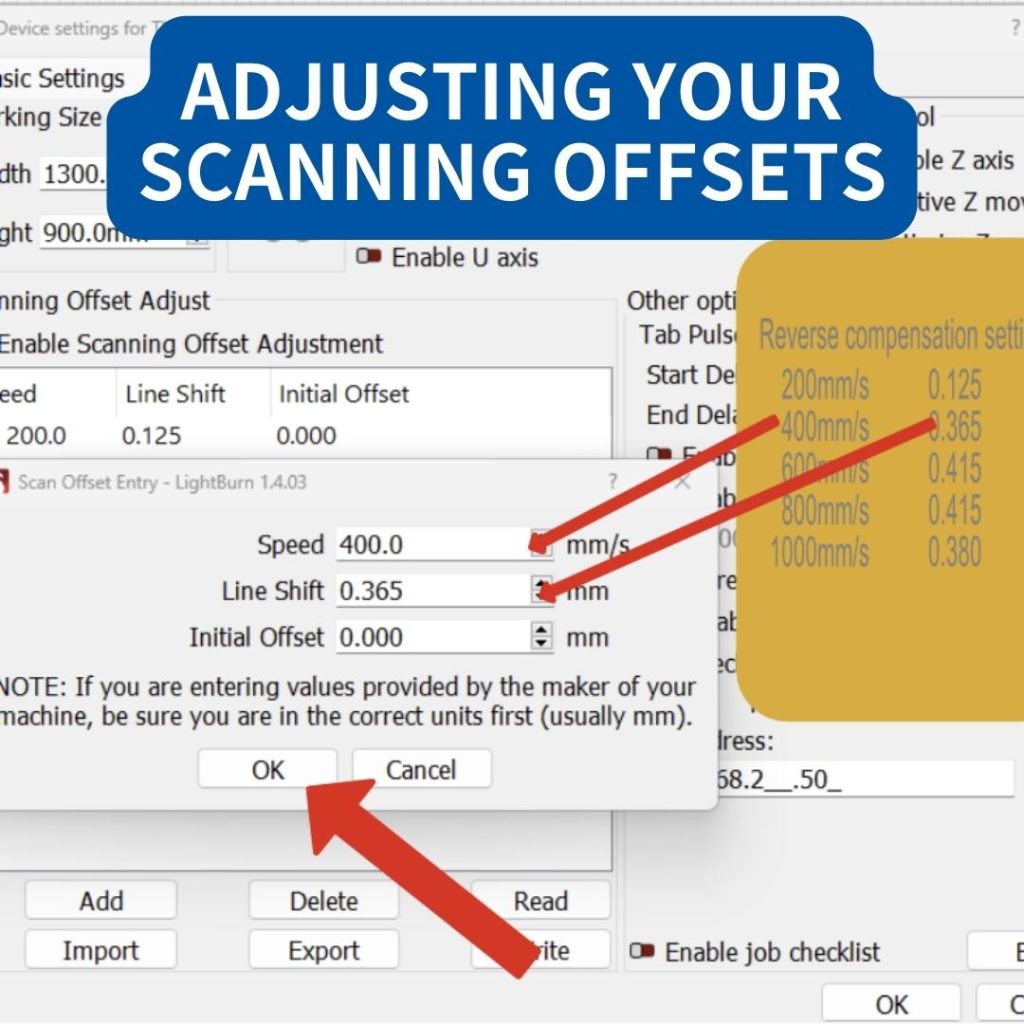
Input Your Scanning Offsets into Lightburn
Gold Scanning Offset Card included with your Bolt
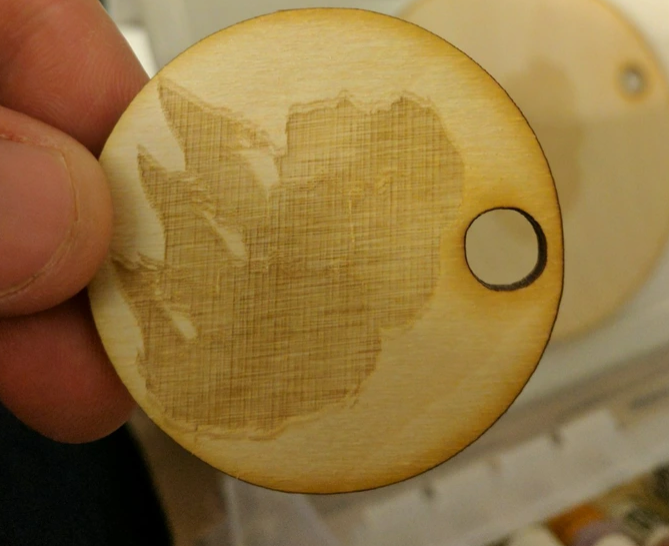
Common Error:Ghosting Image
Scanning Offsets (also known as Reverse Compensation settings), can be found on the gold card that comes either attached to your honeycomb bed, or in your toolkit.
These settings correct small errors that can happen when the laser head changes direction during engraving, especially at higher speeds. Without these, it may look like a faint version of your image is being engraved behind your image – we call this “Ghosting”
Easy to Miss: Check Your Bed is Level!
An uneven bed can cause your engraving and cutting to be inconsistent in different areas of the material. One sign of this mistake is if engraving that looks darker/lighter or out of focus in different areas. Check to ensure your honeycomb tray is level as this is an often overlooked error especially when you’ve just received your machine for the first time!
This simple error can occur when you remove your zap straps from your tray and set the tray back in its place
To make sure your bed is level, follow our helpful guide HERE .
This Getting Started with Thunder Bolt Blog Series Covers the following Topics:

.png "laser cutter Globle")


