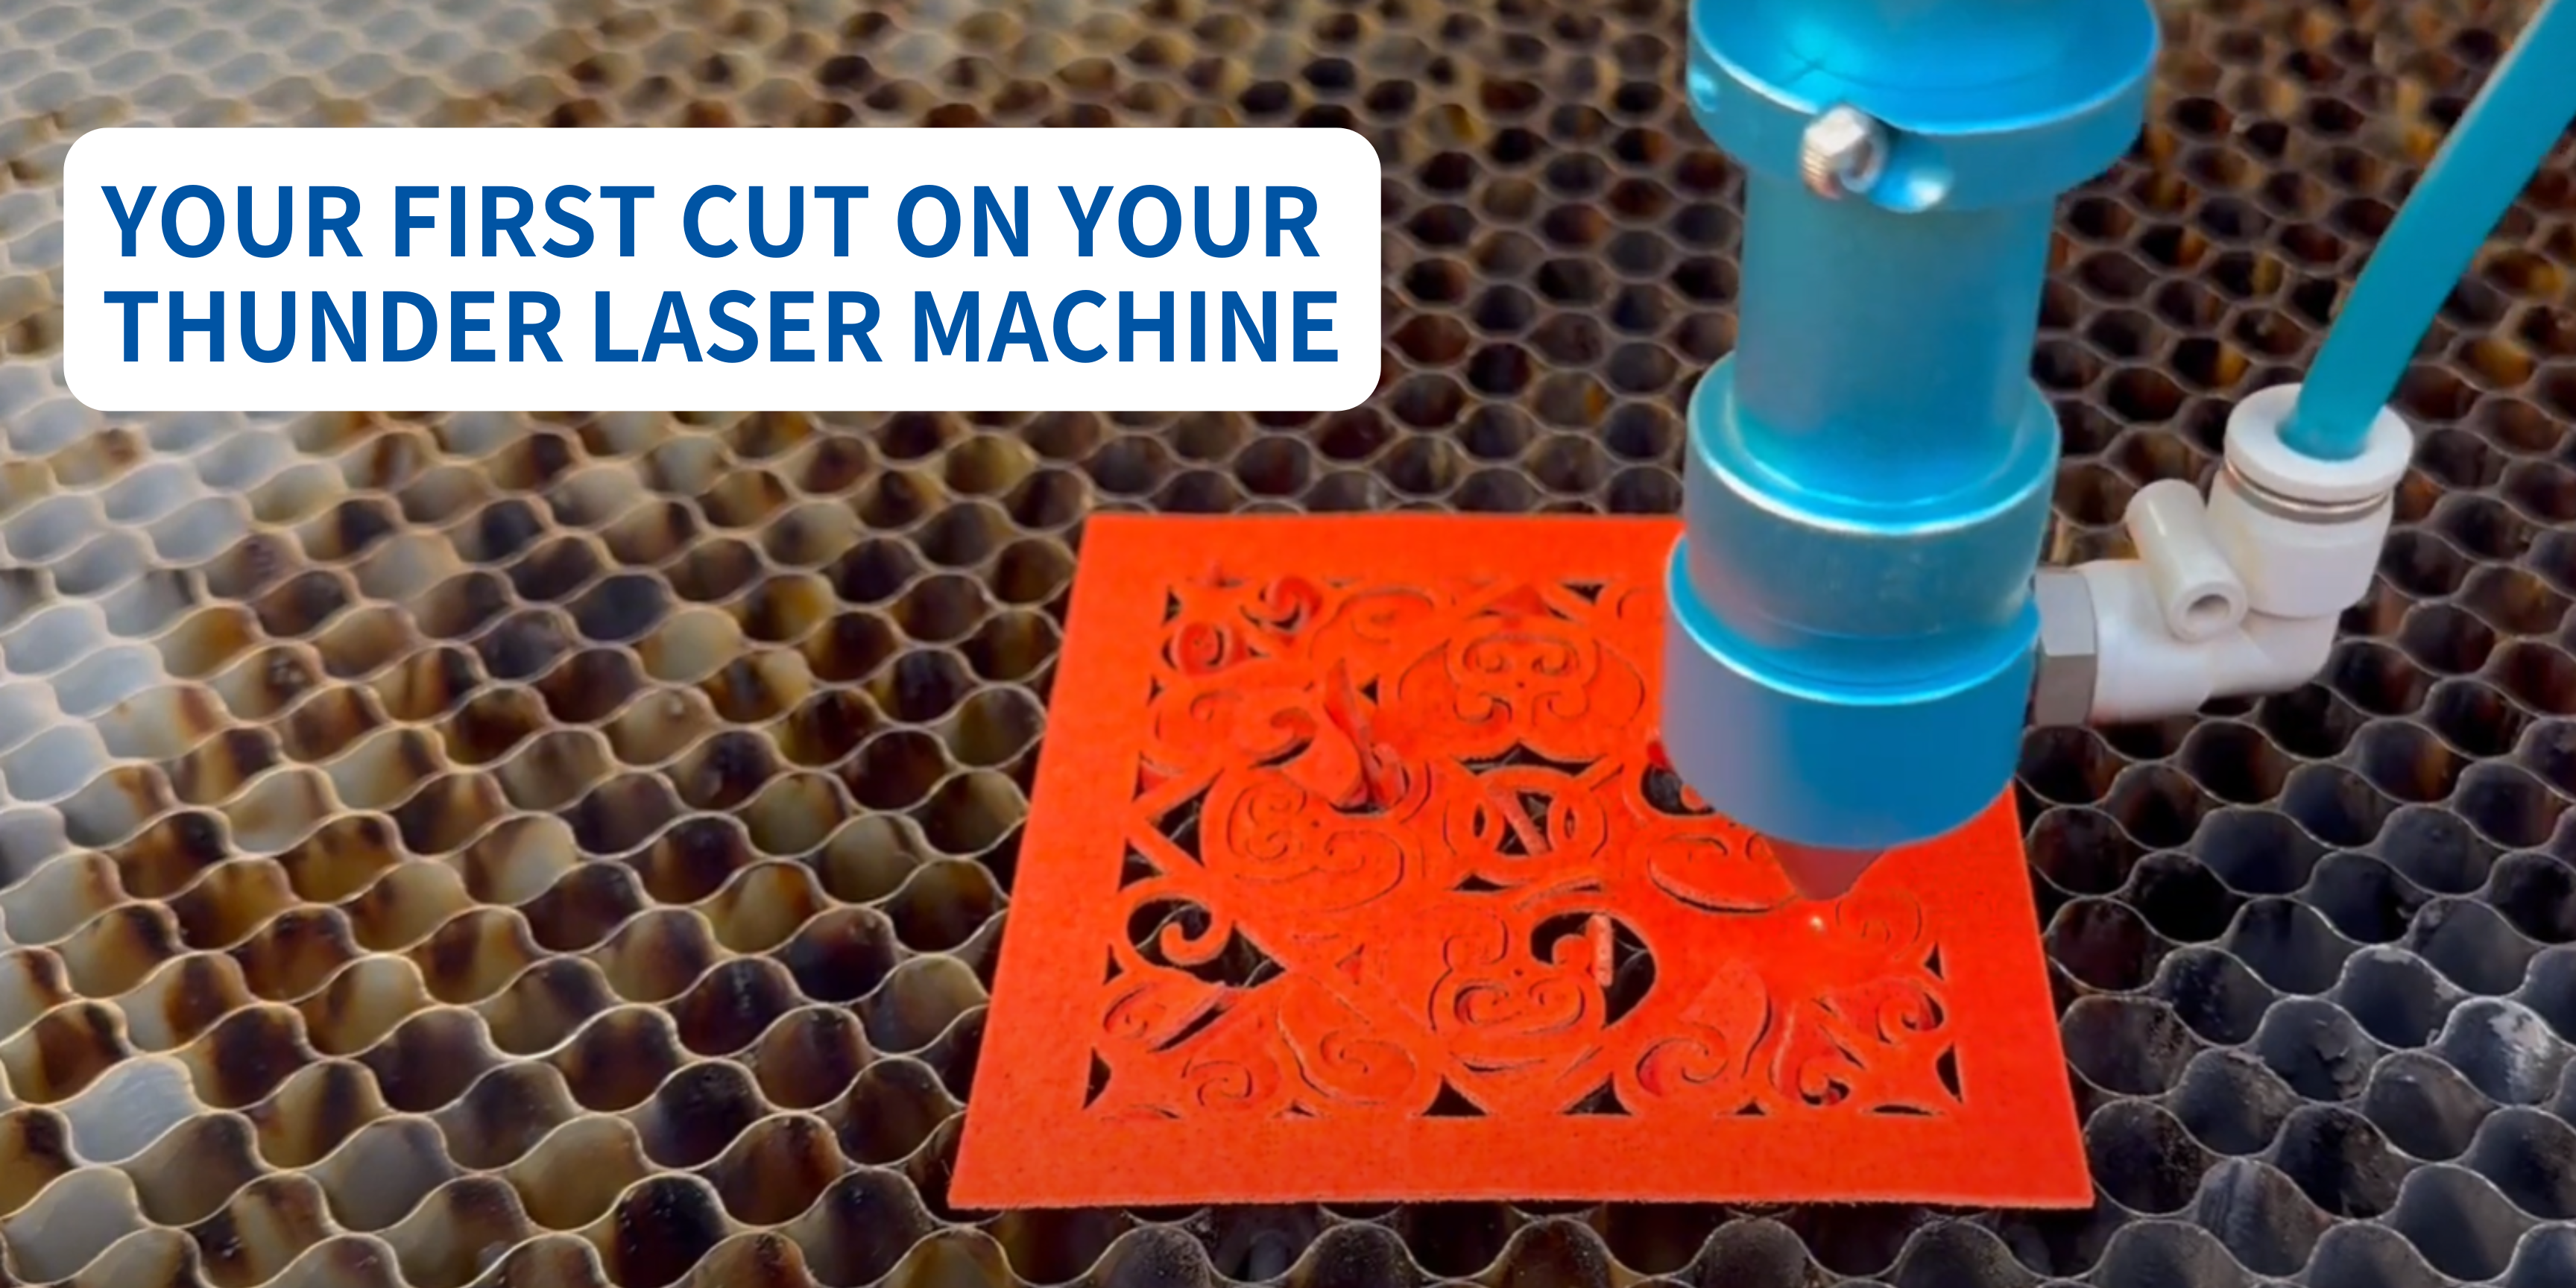
Step 1: Picking your artwork Vector vs. Image and Design in Lightburn.
Option a) Using Vector Artwork:
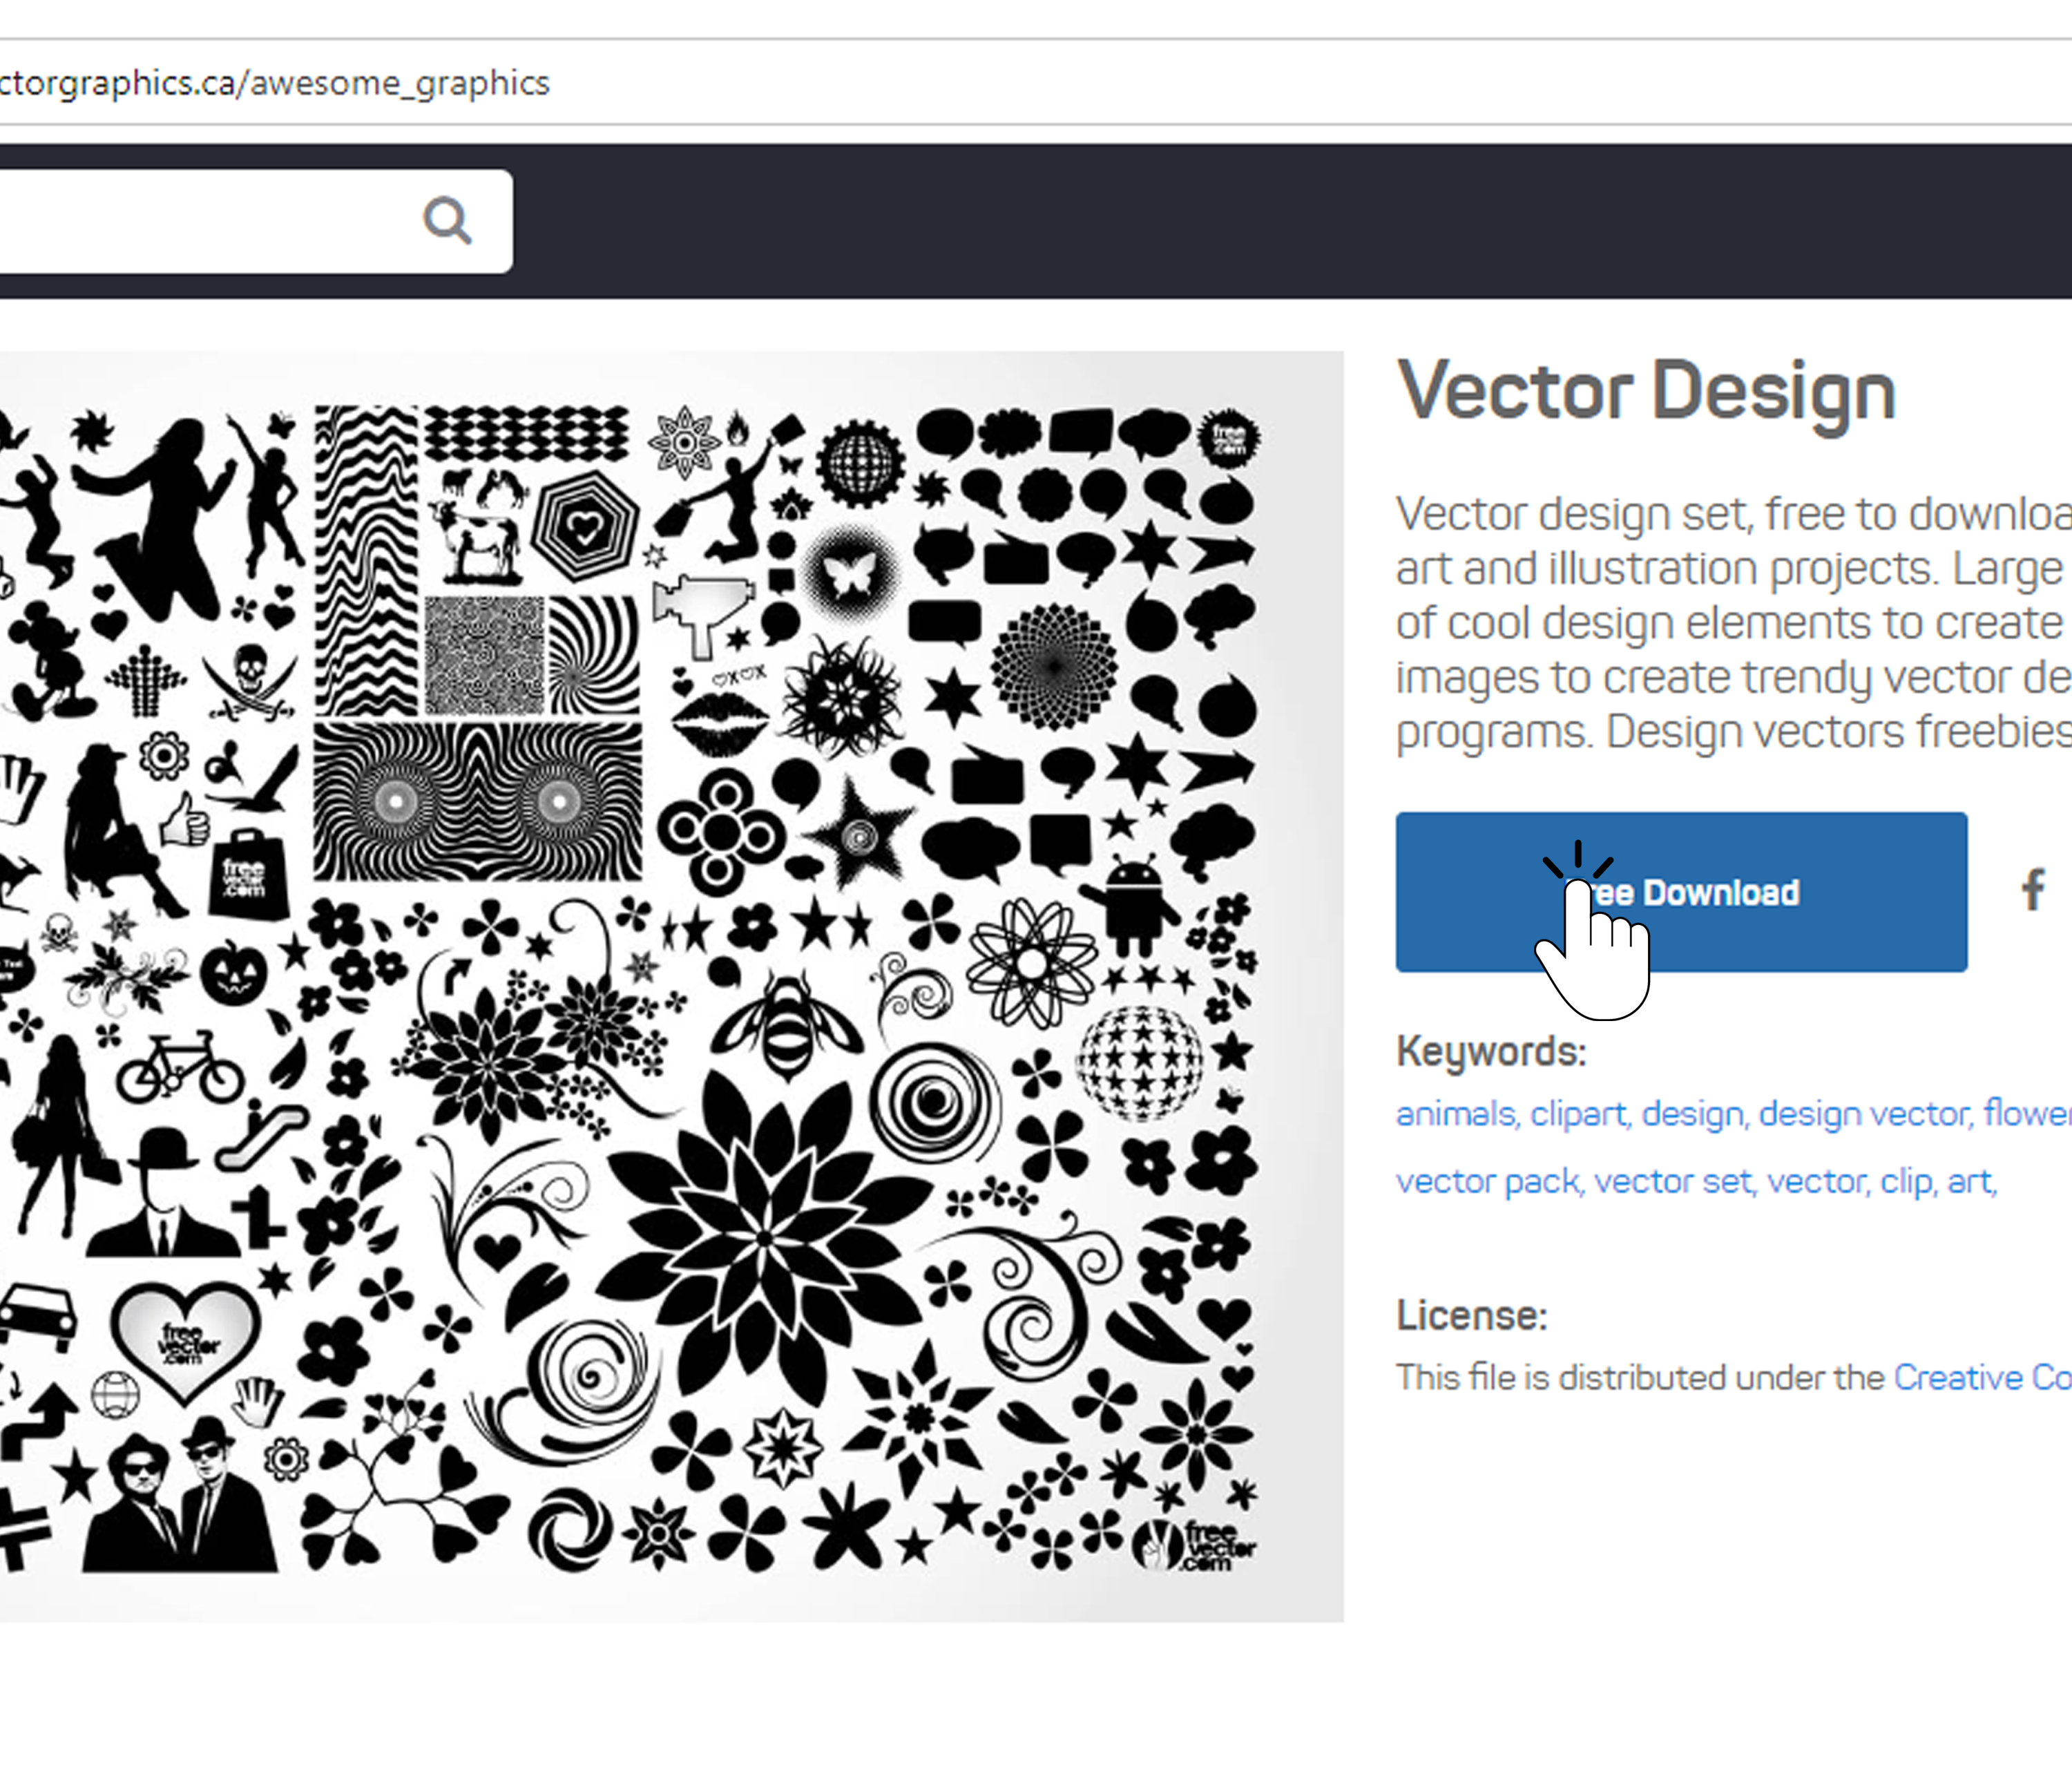
Searching “free vector -enter whatever image you want here-”
Look for an image that is high contrast back and white, without a lot of details for your first cut.
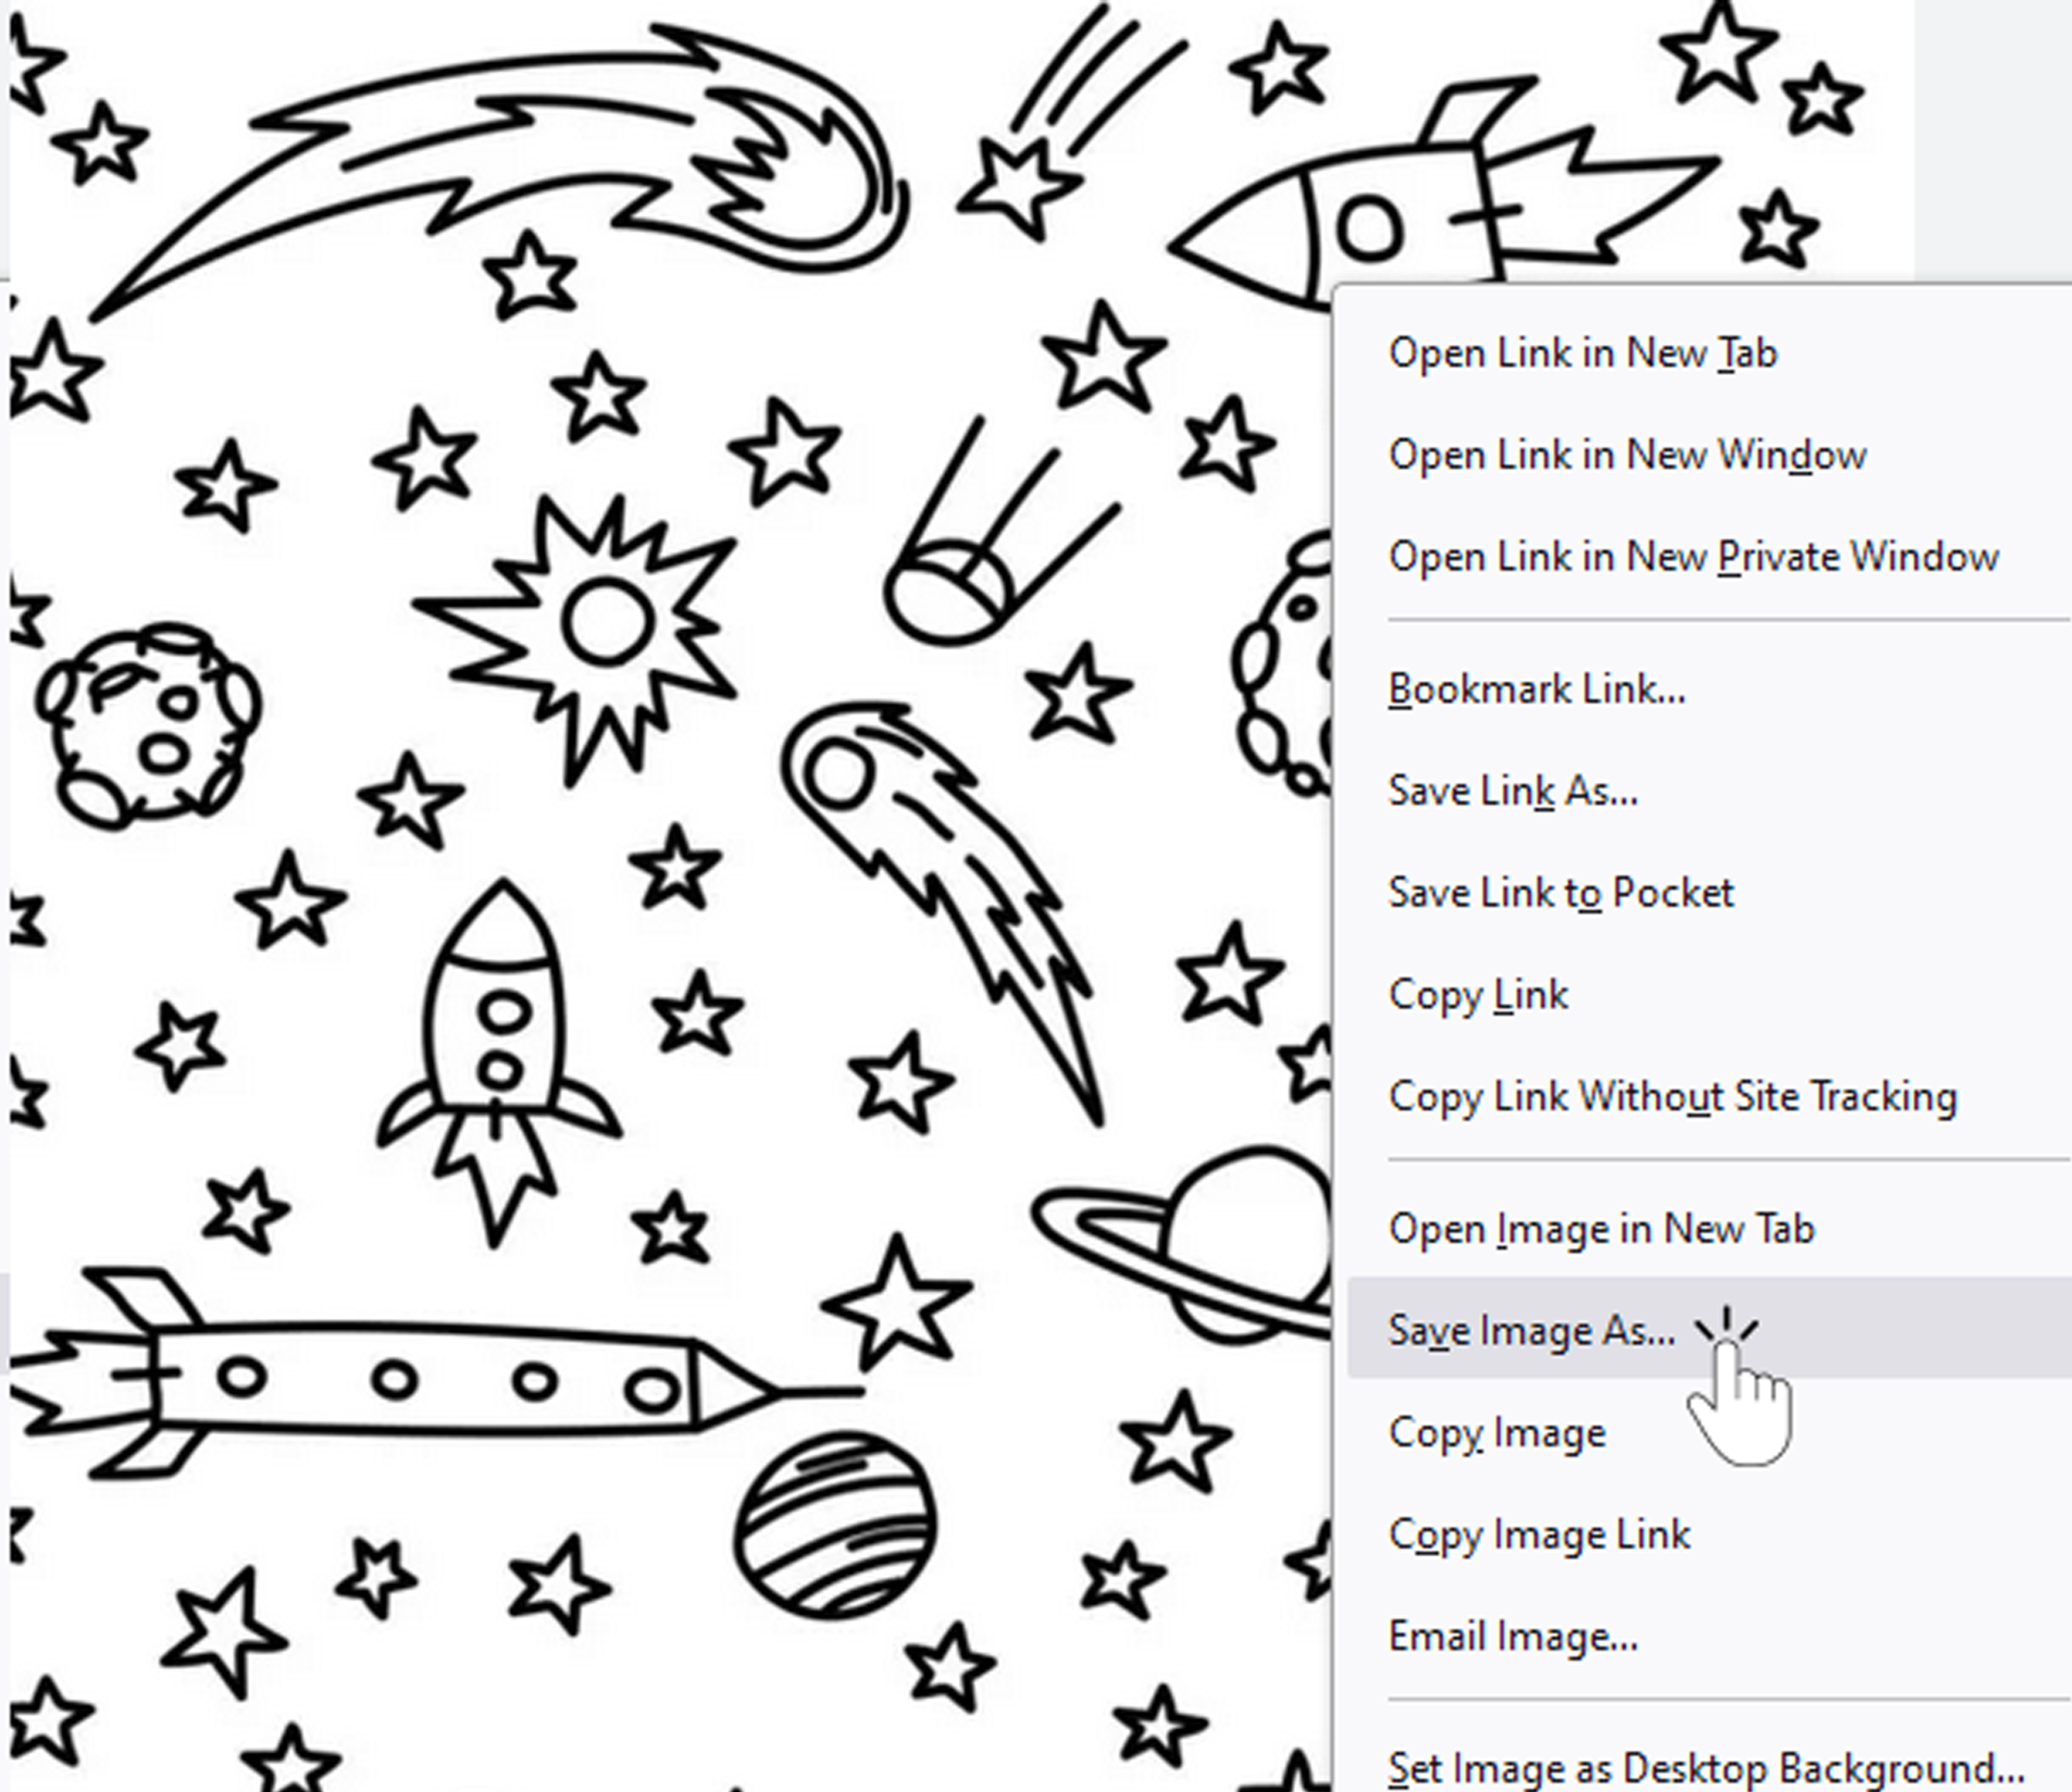
Right click to “Save As” OR Click “Print Screen” or select the area of the screen you want to capture.
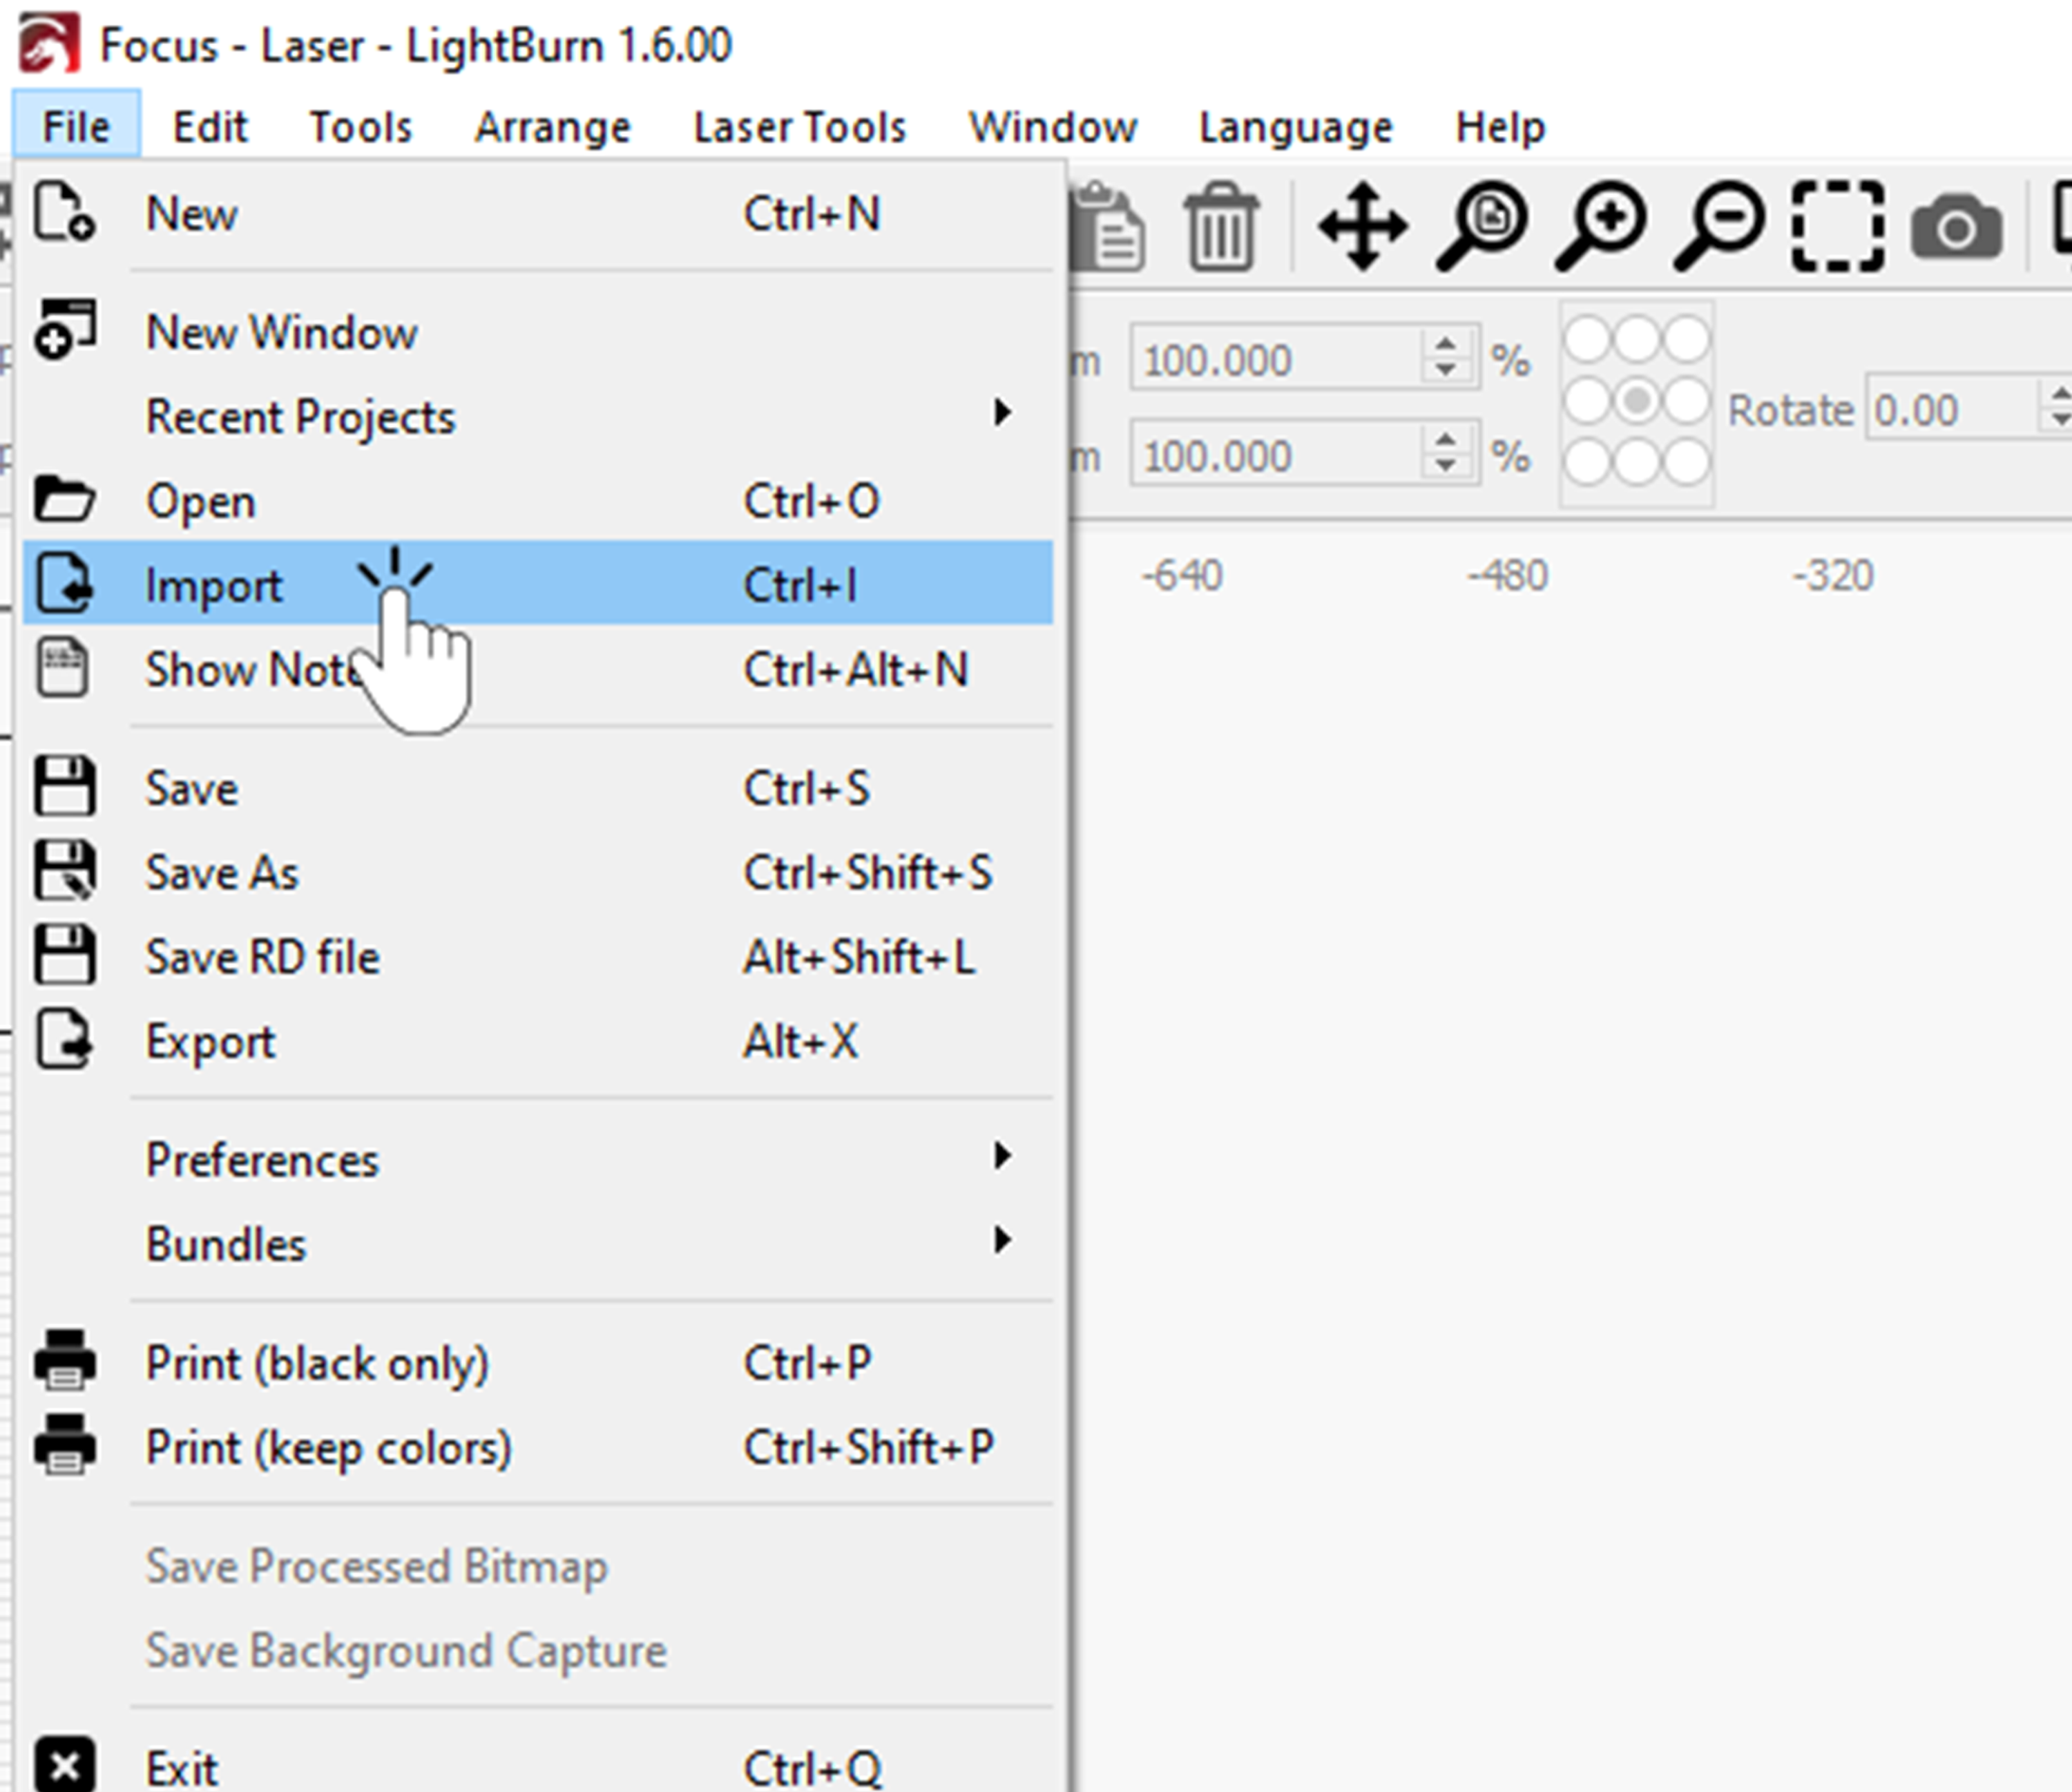
Click File>Import (if saved) or Right Click and Paste (if screen captured)to insert the image into LightBurn
Right Click and Select “Trace Image” and adjust the threshold and cutoff until the whole outline of the image is selected then click “OK”
Drag and Select then whole image, then right click and select “Ungroup”
Step 2: Setting Up your Layer Types, Speeds and Power
This video introduces you to the Cuts and Layers window in Lightburn. Here, we explain the basics of what you need to know in order to assign settings to your designs before you send them to the laser. Read more here about how to determine settings for your machine.
This video shows you the Preview window in Lightburn, and discusses how this tool can be useful in planning your projects and catching simple mistakes before you send your job to the laser to cut or engrave.
Step 4: Setting Up Origin in LightBurn: Absolute, User or Current Position
If youve ever had an issue with your projects not running where you want them to on the laser, its most likely a job origin issue. This video will give you the run down of the different ways to position your laser (Absolute Coordinates vs User Origin), and have it run your jobs exactly where you need them to be.
Step 5: Send the Job to the Laser
This quick video discusses how to transfer your files over to the Thunder Laser.
Step 6: Aligning your Material, Focusing, and Starting Your Project
Lets get the party started. These are the final steps you’ll need to take outside of Lightburn in order to ensure your project cuts just the way you want it to, including keeping your materials flat on the bed, and autofocus vs manual focus

.png "laser cutter Globle") International
International
 United States
 Brasil
 Canada
 Česká
Česká
 Ελλάδα
 Polska
 Ireland
 Portugal
 Lietuva
 Россия
 Deutschland
 Britain
 Україна
 France
 Sverige
 한국
한국
 中国
中国
 ประเทศไทย
 香港
香港
 Israel
 臺灣
臺灣
 India
India
 Australia
 New Zealand
 South Africa